当拖一个View或者Control到画布上时,Interface Builder会自动给其建立一组与画布左上角相关的Prototyping Constraints。当创建一个Constraint后,Prototyping Constraints将被自动移除。
Auto Layout和Constraints的原理参考Auto Layout[1]-Constraints。
Interface Builder提供了三种配置Auto Layout Constraints的方式,分别是Control-Dragging、Pin & Align Tools和通过Interface Builder自动建立Constraints后进行编辑三种方式。
Control-Dragging
按住Control键,并按住某个View并拖动到另一个View上:
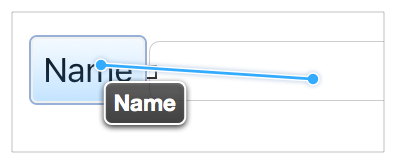
出现一个选择项:
如果拖动的方向偏水平,则会出现水平的Constraints选项,反之,则会出现垂直的。
尽管Control-Dragging的方式很快,但是其是基于当前的Scene的Layout进行的,如果需要更精细的控制,使用下述的方法。
Stack,Align,Pin and Resolve Tools
Interface Builder在右下角提供了四类工具:
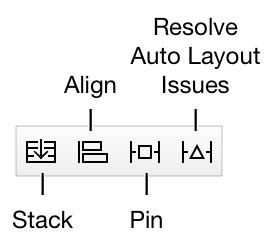
Stack Tool
选择一个View,并点击Stack Tool,会自动创建一个StackView,并将其原先的View嵌入到StackView中。
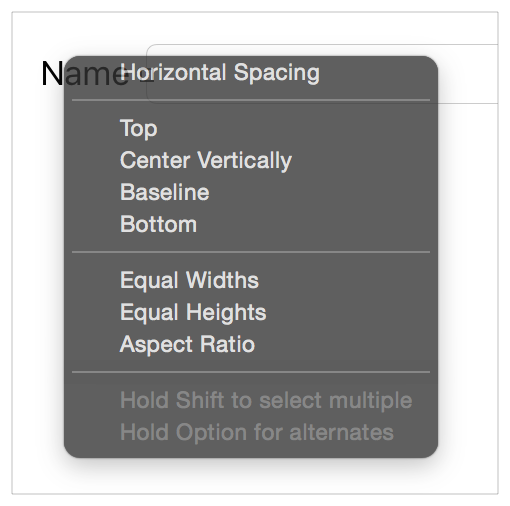
Align Tool
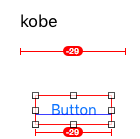
Align Tool一般用于快速地排列一组元素,选择多个需要水平或者垂直排列的View,并点击Align Tool,会弹出一个选择项:
在Leading Edges输入100,则第二个到最后一个View都会以第一个View的Leading为基准,向右偏移100,即除了第一个View,其他View.x的位置都比第一个View.x大100。
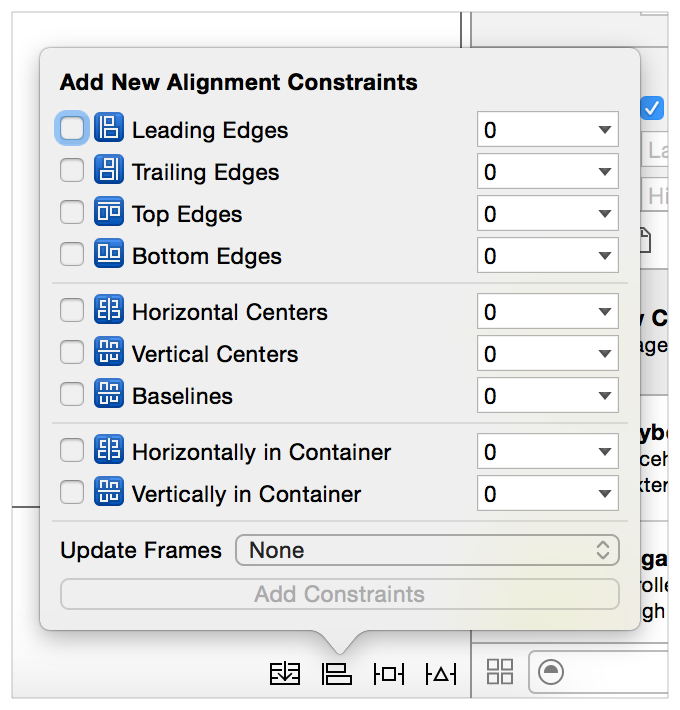
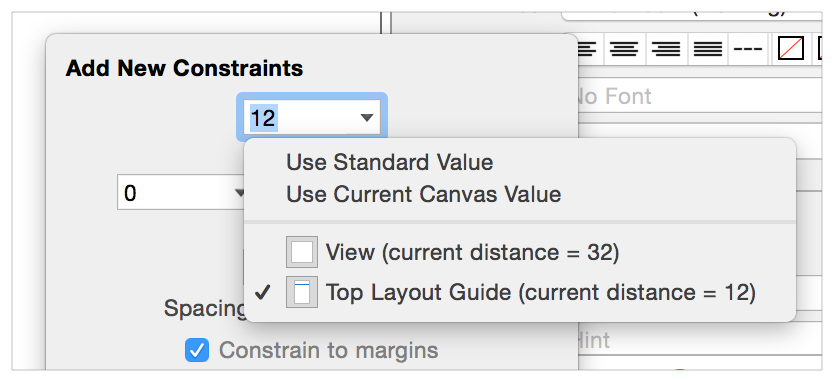
Pin Tool
Pin Tool一般用于快速地定义一个View相对于旁边View的位置,或者快速地定义大小。选择一个View,并点击Pin Tool,会弹出一个选择项:

在Top Edges输入100,则将其位置调整到离它上面最近的View距离100的位置,点击下拉框,可以选择其他View为标准,不一定是最近的。
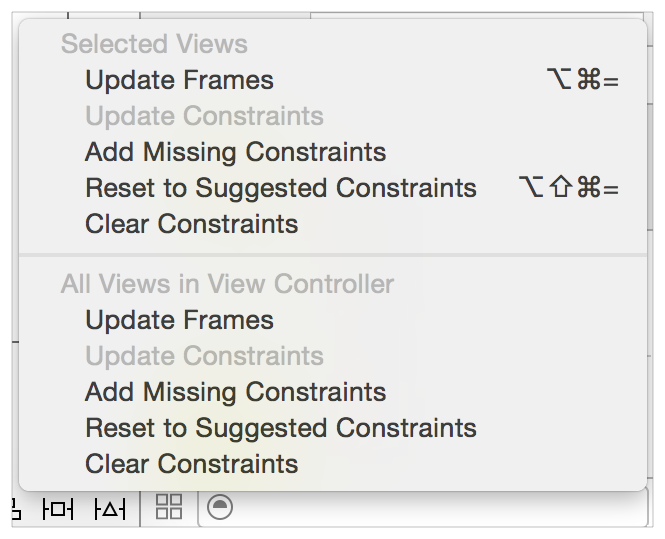
Resolve Auto Layout Issues Tool
Resolve Auto Layout Issues Tool提供了一些对整体Views操作的选项,上方是对选中的Views进行操作,下方是对所有Views进行操作。
使用IB自动创建Constraints
IB可以自动创建Constraints,首先在画布上布局好Views的大小和位置,并选择需要自动创建Constraints的Views,然后点击:
Resolve Auto Layout Issues tool > Reset to Suggested Constraints
IB会自动创建这些Views在当前布局中的Constraints。
也可以预先在Views上添加了Constraints,然后点击:
Resolve Auto Layout Issues tool > Add Missing Constraints
IB会自动补齐Constraints。
查找和编辑Constraints
Constraints in Canvas
I-bars
显示两个Item之间空间的大小,或者Item的高宽度。
Plain Lines
显示View的Edges。

Solid Lines
表示Priority=1000。

Dashed Lines
表示Priority<1000。

Red Lines
表示有错误,可能是Constraint存在歧义,或者无解。

Orange Lines
表示View当前的位置与Constraint不符,可能是刚被拖动导致。
Blue Lines
表示Constraint没有问题。
Equal Badges
表示长度或宽度相等。
Greater-than-or-equal and less-than-or-equal badges
表示不等式。
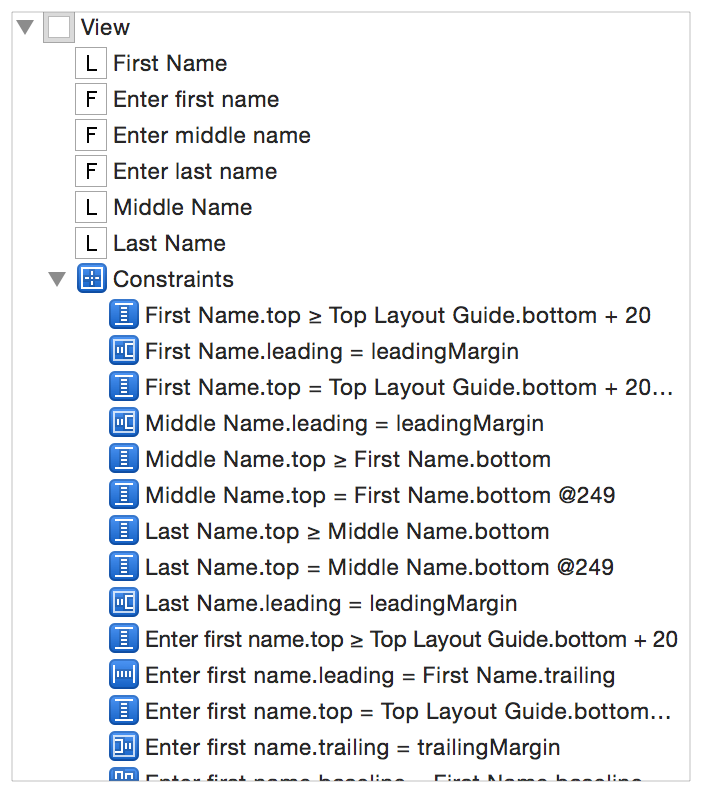
Constraints in Doucument Outline
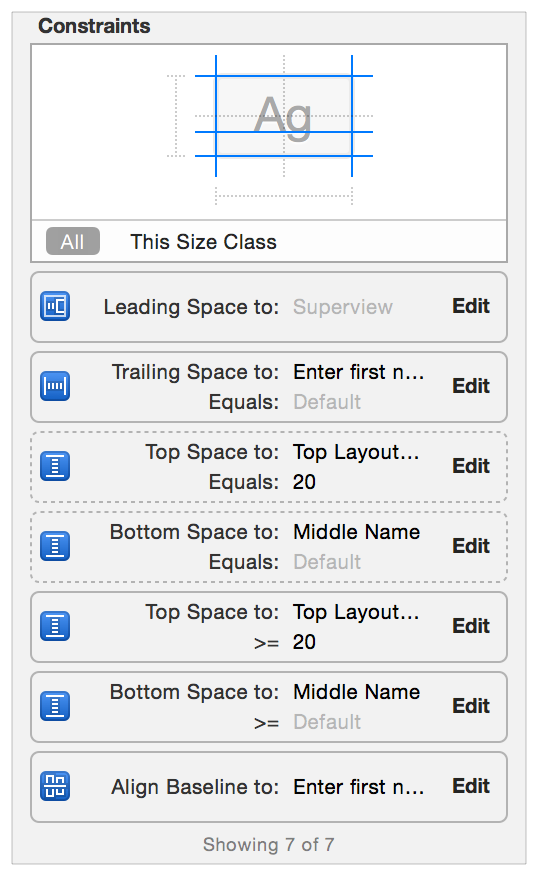
Constraints in Inspector
Size Inspector中可以看到选中View的Constraints。
Examing & Editing
当点击一个Constraints进行编辑时,可以看到Inspector:
其中的identifier是用于Constraint在控制台或者其他Debug任务的识别名称,Placeholder表示该Constraint只在设计阶段存在,在运行时会被移除。
Size Class-Based Layouts
IB下方有一个图标,如下:
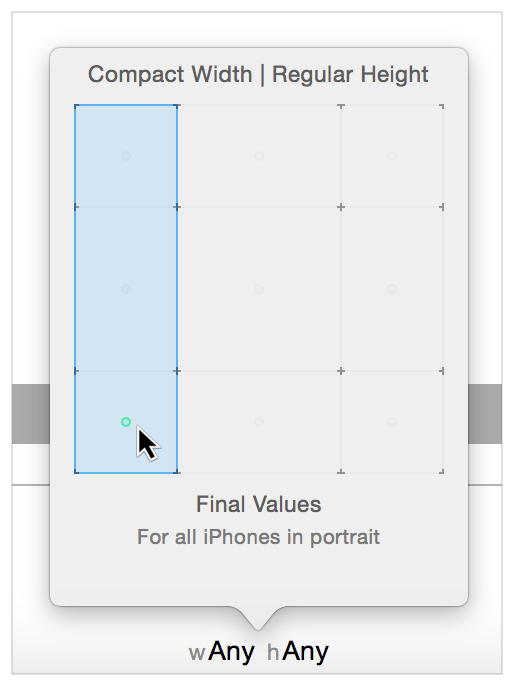
可以用于选择不同尺寸,用于适配不同屏幕,例如,可以直接在IB中通过选择不同的矩形,查看横屏和竖屏的布局。
需要注意的点:
- 从Canvas或者Document Outline中删除某个项,将会直接从项目中移除,包括所有的Size Class;
- 从其他地方删除某个项,只会从当前Size Class中移除;
- Command-Deleting某个项,只会从当前Size Class中移除;
- 如果选择的是Any-Any模式,删除某个项将会直接从项目中移除。
Features
iOS系统上有一些与Auto Layout交互的Features(特性)。
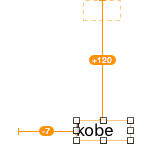
Top & Bottom Layout Guides
Top & Bottom Layout Guides表示当前View Controller的可见内容区域的上下边界,不包含Bars(Status Bar、Navigation Bar、Tab Bar)。
Layout Guides适配了UILayoutSupport协议,提供length属性,该属性表示ViewController的View的边界与Guide的边界之间的距离,例如,上方的就是View的Top与Bars的Bottom之间的距离。
Layout Margins
Auto Layout默认给每个View定义好了Margins(内间距),便是View与SubViews的边缘的距离,通过layoutMargins或者layoutMarginsGuide属性可以设置。
Margins的默认值为8,而ViewController的Root View的Margins是由系统维护的,上下Margins为0,而左右Margins取决于Controllers呈现的方式,只能是16或者20,无法修改。
当放置一个View到它的SuperView中时,一般使用Layout Margins而不是Edges,NSLayoutAttribute中定义了所有的Margins属性。
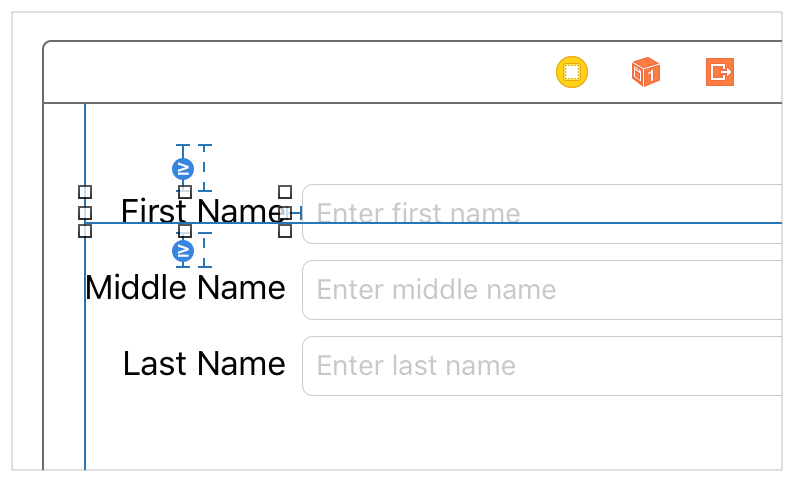
IB中,当使用Control-Dragging方式时,默认使用Margins来创建Constraints,如下图:

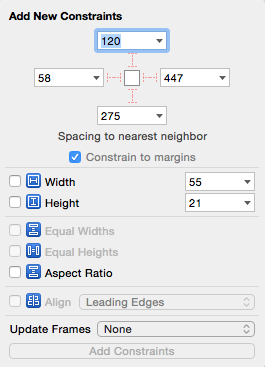
当使用Pin Tool方式时,可以勾选”Constrain to margins”的选项框,如果没被勾选,则使用Edges,如下图:
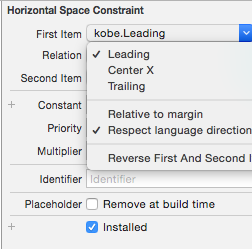
当点击一个Constraints进行编辑时,可以看到在First Item和Second Item中可以选择“Relative to Margin”,如果不选择,则是Edges,如下图:
当在代码中创建与SuperView的Margins相关的Constraints时,使用layoutMarginsGuide属性。
Readable Content Guides
View的Readable Content Guides属性表示该View中文本对象的可选最大长度,理想状态下,文本足够短以便用户可以直接阅读他,而不需要转动脑袋。
Readable Content Guides一般是在View的Layout Margins中且居中,其Size随着系统的动态Size变化而变化。当用户选择更大的字体时,系统创建更宽的Guides以便阅读。
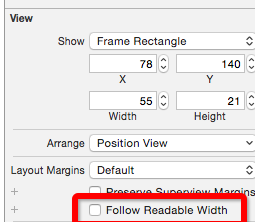
在IB中,你可以设置Views的Margins表示Layout Margins还是Readable Content Guides,选择一个View,在Size Inspector中可以勾选”Follow Readable Width”进行选择。
Semantic Content
如果设置了Leading & Trailing Constraints,则当转换语言方向时(有些国家习惯从右到左),此时Views会自动被翻转,然而,一些Views由于特殊的原因,是不能被翻转的,例如游戏里面控制上下左右的旋杆。
semanticContentAttribute属性可以设置View是否会被翻转,在IB中,View Insepctor中可以设置该属性,如下图:
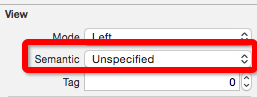
默认是Unsecified,此时View会随着阅读方向的变化而翻转,如果设置成Spatial,Playback,Force Left-to-Right,则一直从左到有,设置成Force Right-to-Left,则一直从右到左。
Rules of Thumb
下面是一些注意点和使用技巧:
- 不用使用Frame,Bounds和Center属性来声明View的几何信息;
- 尽可能使用Stack View,Stack View可以自动管理内容的Layout;
- 在两个相邻的Views之间创建Constraints,而不要越过其中一个去连其他较远的View;
- 避免给Views赋值固定的宽高度,可以通过设置Size最大最小区间;
- 尝试使用Pin & Align Tools,常常可以解决一些麻烦问题;
- 小心使用自动更新Frame,如果Constraints没有定义好大小和位置,Frame经常数值为0,然后被放置到左上角;
- 确保所有Views有着有意义的名称,以便更容易地被识别;
- 使用Leading & Trailing替代Left & Right,原因参考Auto Layout[1]-Constraints;
- 当在代码中初始化Views时,注意设置translatesAutoresizingMaskIntoConstraints属性为NO,否则,系统会自动根据Frame和AutoResizing Mask创建一组Constraints,很可能与你自己创建的Constraints冲突;
特别注意,如果Item与View Controller的Root View的边之间要创建Constraints时:
- 如果是水平方向:(1)对于大多数Controls,使用跟Layout Margins的Zero-Point Constraint;(2)对于MarginToMargin填充满RootView的Text Object,使用Readable Content Guides;(3)对于EdgeToEdge填充满RootView的其他Item,使用Leading & Trailing Edges;
- 如果是垂直方向:(1)如果View延伸到Bars下面,使用Top & Bottom Margins,特别是ScrollView,允许在Bars下滑动内容;(2)如果没有延伸到Bars下面,使用Top & Bottom Layout Guides。